Content
If you do not need to import transaction history, it is recommended that you create starting balances and simply enter transactions going forward. Aplos uses fund accounting and QuickBooks does not. This means our systems are very different. Importing QuickBooks information may bring over some of the problems you were trying to solve by switching to a fund accounting system. Instead of classes, Aplos uses funds. Aplos also uses tag layers to get granular reporting.
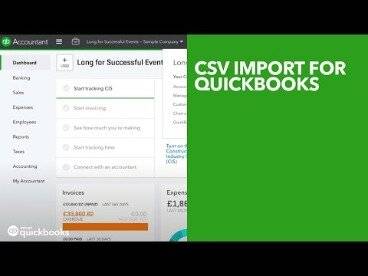
How do I import a CSV file into QuickBooks?
Click the Drag and drop or select files button. Select the CSV file and then Open. In the QuickBooks account dropdown, select the account you want to upload the transactions into. Follow the onscreen steps to match the columns on the file with the correct fields in QuickBooks.
Most How To Import Data Into Quickbookss accept saved Excel worksheets or CSV files, and some also provide other options. Alternatively, you can also import all the available data from a QuickBooks Desktop file. Now click on customize column button to choose the column you wish to see in Add/edit multiple list entries window. Or you can also select the default button to go back to the Pre-set columns.
Duplicate Customers In QuickBooks
Click “Browse” and navigate to the IIF file you created. Click “Open.” The Import wizard will start. Click “Next” and then select the transactions you want to import. Click “Finish” when the wizard completes the process.
- SaasAnt Transactions Online is power-backed with a myriad feature including data validation, cent percent reliability, without-any shuffles/mismatches.
- Without overwriting any previous backup you can back up the QuickBooks company file.
- Click the ‘Upload’ button.
- You can now have a look at the mapping along with “Headers” in the file on the screen.
- These submissions add clutter to our system and prevent us from responding to important requests quickly.
For tips on importing your contacts that you export from QuickBooks, see our resource on Importing Contacts. Below are recommended steps to export your contact list from QuickBooks. Instead of relying on an excel file, log into your bank account and download the transaction data as a .QBO file. You can also use CSV files – which are accessible through Microsoft Excel and any other spreadsheet program – to import transaction data into QuickBooks Desktop.
How can I open the QuickBooks File in Excel?
This will help you track your designated funds accurately and give you greater accuracy on your reports. Click “Import” to begin the data import process. If you want to import multiple line item invoices or need to import invoices from a Pro or Premier version of QuickBooks, then get in touch with our data migration experts. Ensure that your invoices are saved as single-line items in the spreadsheet.
- One correct format is Customer Job – Service Item – Payroll Item – WC Code – Notes – Class – Total.
- SelectBrowse and choose the Excel file.
- The next step is to assist QuickBooks in parsing through the transactions.
- If any data is missing, you’ll see a warning sign.
- Choose the account type, then follow the instructions to create the account.
Follow the wizard in importing files. Select the type of data. You can import Customer, Vendor, Items, and Chart of Accounts from an Excel spreadsheet. There are several options available when importing Excel files from QuickBooks. With these tools you can import into QuickBooks, move data from one file to another, and import data for reconciliation as OFX/QBO files.
A Step-By-Step Guide to Importing Bank Data Into QuickBooks Online
Date and Description columns should be preselected and the amount column needs to be set. IIF imports will break the database links that both software programs use for transactions. This may require some manual tweaking to re-establish those links after you’ve imported the data.
What Cannot be imported into QuickBooks Online?
- Invoices.
- Estimates.
- Sales receipts.
- Bills.
- Purchase orders.
- Journal entries.
- Delayed charges.
- Delayed credit.
To identify the available headers from your file you have to select the This data file has header rows checkbox. Import data, including fields with blank values, should replace the existing data. To view the available headers in your file, choose the This data file has header rows checkbox.
Import products and services from Excel into QuickBooks Online
Click on Close after the setup has extracted all the files in the desired location. Choose the Memo option to add more information. Click on the Assembly drop-down list, then choose the product that you want to build. Save the file as a normal text file, then rename it and add .iif at the end of the file name. Click on Done once QuickBooks has imported the Price Level data. Click on any list item to see more information.